 Recipes
Es gibt ja unzählige Rezepte für rohe Brownies im Netz. Und ich habe viel ausprobiert. Und noch mehr selbst herumprobiert, bis ich endlich auf dieses Rezept gekommen bin.
Es ist relativ einfach, vielleicht schmecken sie deswegen auch so unglaublich gut.
Das wichtigste sind die Datteln. Im Gegensatz zu den meisten schwöre ich nicht auf Medjool Datteln, zumal sie auch so wahnsinnig teuer sind.
Diese Brownies, und die meisten rohen Treats, gelingen tatsächlich am besten mit sehr weichen Datteln, wie man sie z.B. beim Türkischen Supermarkt bekommt. Sie kommen in der Regel in einer Kiste (so sieht das aus) und sind nicht entsteint. Das ist zwar bei großen Mengen etwas Pulerei, aber die Mühe lohnt sich. Dadurch werden die Brownies unglablich saftig und weich. Also, viel Spaß beim Pulen und los geht’s:
200g aktivierte und getrocknete Nüsse
150g entsteinte Datteln (Gewicht ohne Stein!)
2 EL roher Kakao
1 TL reines Vanillepulver (hier nicht sparen!)
1 kleine Prise Salz
Der Klassiker der Brownies wird mit Mandeln gemacht. Aber auch Cashews funtionieren super, wenn man z.B. auf Mandeln allergisch ist. Mit Cashews wird es wesentlich sanfter und schmeckt fast wie Milchschokolade! Walnüsse geben dem ganzen etwas ganz Besonderes! Ich verwende am liebsten eine Mischung:
100g Cashews
50g Mandeln
50g Walnüsse
Aber man kann das frei kombinieren. Schaut einfach, was Euch am besten schmeckt!
1. Zuerst die Nüsse in die Küchenmaschine und kurz grob zerkleinern, ca 5 Sekunden. (Wenn Ihr ausschließlich Cashews verwendet, könnt Ihr Euch diesen Schritt sparen. Sie sind so weich, dass sie auch direkt zusammen mit den Datteln gemixt werden können.)
2. Dann entsteinte Datteln, Kakao und Vanille dazu geben und mixen, bis eine Art “Teig-Ball” in der KM entsteht bzw. die Masse gut zusammenklebt. Dann aufhören, sonst tritt zuviel Öl aus den Nüssen aus und die Brownies werden zu weich.
Wenn Ihr keine KM habt, könnt Ihr die Bronwies auch im Mixer zubereiten.
3. Anschließend am besten auf einer Dörrfolie ausrollen, ca. 1 knappen cm hoch.
Dann die Schokoglasur herstellen. Dafür braucht Ihr:
50g Kakaobutter
30g roher Kakao
20g Kokosblütennektar
Gojis zur Deko
Kakaobutter über dem Wasserbad schmelzen, dann Kakao und Nektar einrühren. Anschließend über die Brownies geben und bevor sie abgekühlt ist, ein paar Gojisdrüber streuen. Fertig!
Je nach dem, wie dick Ihr die Glasur auftragt, werdet Ihr wahrscheinlich etwas übrig haben. Das macht aber gar nichts: stellt sie einfach in den Kühlschrank. Sie hält sich dort ewig und Ihr könnt damit alles mögliche machen: pur als Schokolade austreichen, Obst oder Eis eintunken oder für die nächste Ladung Brownies aufheben…
So, mein Mann hat mir grad über die Schulter geschaut und das Bild gesehen… Ratet mal, was er heut Nachmittag essen will! Aber zum Glück kann er jetzt ja selber nachlesen, wie es geht!
Übrigens: Sogar ein kleiner Mixer wie der Personal Blender schafft diese Brownies – Ihr müsst also auch auf Reisen nicht auf sie verzichten! Es funktioniert am besten, wenn man zunächt die Nüsse zerkleinert und dann die Datteln mit den restlichen Zutaten (außer Nüsse) einzeln zu einer Paste vermixt. Abschließend kann man dann Nüsse und Paste mit der Hand verkneten und wie gewohnt weiter vorgehen…
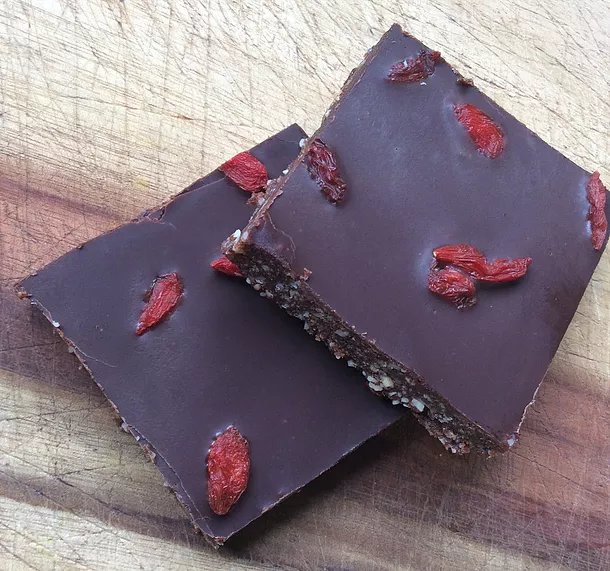
Raw Brownies – an All Time Favourite
There are millions of recipes for raw brownies on the net. And I’ve tried most of them. Well, a lot, anyway. And I have been experimenting for a long time before coming up with this version.
It is quite simple, maybe that’s why it is so delicious. The most important and crucial incredient are the dates. Unlike most I’m not in love with Medjood dates, especially because they are incredibly expensive.
You get the best results with these raw brownies, as well as with most raw treats, if you use very soft fresh dates, the ones you can get in an Arab super market, or in my case, also in my local health shop. They usually come in boxes and are not pitted (they look like this). Which means you might have to do a lot of pitting when using large quantities. But it’s well worth the effort! They make the brownies irresistably soft and juicy. So, get pitting!
You will need:
200g activated dried nuts
150g pitted dates (weight without pit)
2 Tbsp. raw cacao
1 tsp. pure vanila extract
a dash of salt
The classic raw brownies are made with almonds. But cashews work just as well! They have a milder taste and the result almost reminds me of milk chocolate! Walnuts can add a very special, earthy flavour. That’s why I usually go for a combination of the three:
100g Cashews
50g Almonds
50g Walnuts
But you can come up with your own combination. See what you like best! Once you’ve started making these, you will have plenty of opportunities to try something, as you will always be making more!
1. Place nuts in food processor and pulse briefly to chop them up roughly, about 5 seconds. (If you’re using only cashews you can skip this step. They are soft enough to go in at the same time as the dates)
2. Then add pitted dates, cacao and vanilla and mix until everything forms a kind of “ball” in the processor resp. everything sticks together well when squeezing it. If you process for too long, the oil from the nuts will make the brownies become too soft.
(If you don’t have a food processor you can also use a good blender)
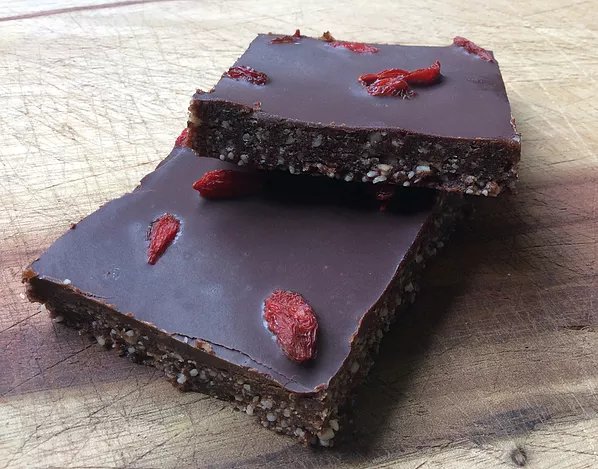
3. Spread the”dough” evenly on a baking or dehydrating sheet, about 1cm high.
Now it’s time for the chocolate glaze:
50g cacao butter
30g raw cacao
20g coconut nectar
Gojis for decoration
Melt the cacao butter over hot water, then add cacao and nectar and combine well. Now spread mixture over the brownie dough and simply add some gojis before the glaze has cooled down. You’re done!
Depending on how thick you apply your chocolate glaze you might have some left over. But I can think of worse problems: just put it in the fridge. It will keep forever and you can use it for all sorts of things: spread it out as dark chocolate, use it to dip fruit or icecream or just keep it for you next bronwie session. I’m sure it won’t be long…!
Right, my husband has just looked at my screen… guess what he wants to eat this afternoon! But luckily now he can just have a look online and make it himself!
By the way: even a little blender, like a Nutri Bullet can manage these bronwies – so you won’t even have to miss them when you’re on holiday! It works best if you chop up the nuts first, get them out, and then mix the rest of the ingredients to make a thick paste. Now mix nuts with the paste using your hands (messy, yes, but also delicious!) and continue as described above…